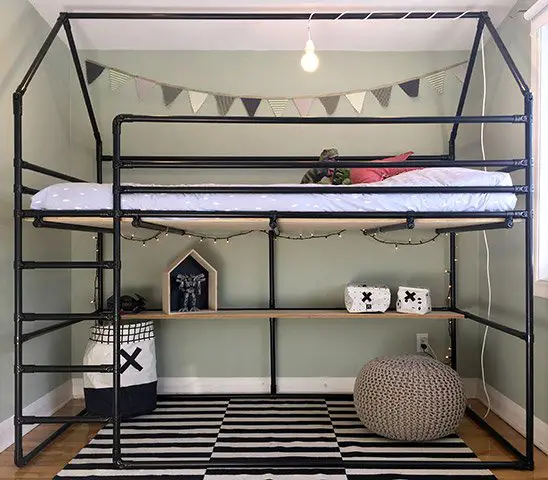
Decorating a small bedroom for a growing boy who needs more space to play? A bunk bed with a workstation under will suit best the small bedroom! Follow us on our journey to build the perfect diy pipe bed made of metal pipes. Now our little boy has a new bunk bed that looks pretty cool.
Decorating A Small Bedroom For A Growing Boy
When you have kids, one of best things in your life is to see them growing and becoming independent. It seems that all the sudden they are no longer babies and they now show and tell you exactly what they like and what they want to do. The truth is that every step is an adventure and we as parents, just love each one.
And far from knowing it, we just stumbled into a new one. Not long ago, we moved from an old-triplex in the downtown area to a modern bungalow in the suburbs. The truth is that hubby and I like to save in what we can. So, we decided that we would try to fit all the old furniture into the new home and only buy what would be absolutely necessary.
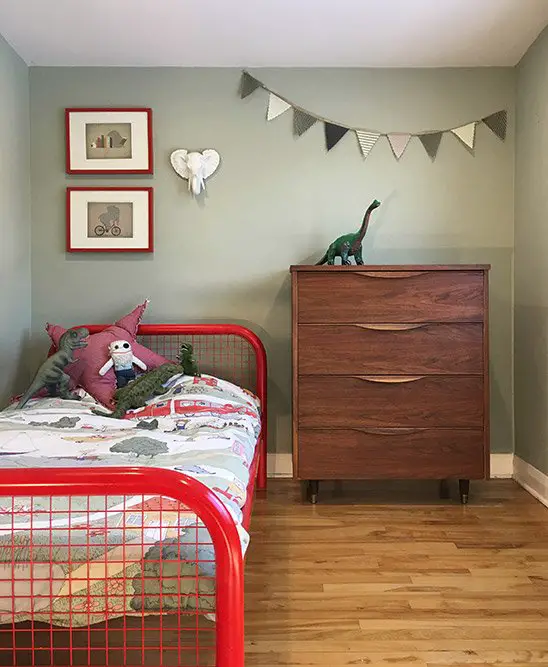
While for most rooms we were able to do it without any major concern, there was clearly a problem with Emile’s room, our little boy. His room in the old house was a lot bigger and the decoration of his room was still the same one as when he was still a baby. So, we decided that we needed to make it better. After all, he had already seen the size of his room getting smaller. The least we could do was to try and change his room decoration into something that would fit his own personality.

And our adventure began…
One of our main concerns with the decoration was related to the size of the room. After all, we all know that it’s not easy to decorate a small bedroom. But this was only one of the problems.
We also discovered that the ceiling in his bedroom has a bit of an angle which could be a severe limitation to the entire decoration.
We decided to talk as a family and decide what kind of bed should suit best the small bedroom. Besides, Emile cleared told us that he loves playing Legos (we just have a bunch of them spread all over the house). Plus, he also has a lot of fun when he does his own blanket forts. So, with all this in mind, Sylvain and I got to the conclusion that we should start looking for a bunk bed with a workstation under. This way, we would be taking advantage of the space in height as well, and Emile would be able to do all the things he loves to do.
On the next day, we started to look for these kinds of beds, even the ones that have a playhouse shape. We saw many. Some were too modern, others too rustic, others that just wouldn’t fit a boy room. But, we did find one. But… It was just a way out of our budget.
Believe it or not, we have never seen so many bunk beds in our lives. And the most surprising thing happened… We only liked one that we just couldn’t afford. So, we had to think about what we were going to do. It was out of the question to not redecorate our boy room. And we wouldn’t certainly pay for a bunk bed that we didn’t like. So, we decided to try our luck online.
We visited many kid’s furniture websites, asked for the help of our friends on Facebook. I can definitely say that we saw thousands of photos on that night. When we were almost giving up for the night, I opened a Pinterest image and this is where I saw it. The bunk bed I wanted for Emile was right there. It was an example of a DIY pipe bed made of joints and metal pipes. On that very moment, we saw what we wanted.
Our DIY Pipe Bunk Bed Project
We just took our DIY skills and took the challenge to create our own version of the bunk bed for Emile’s room.
On the following morning, it was time to plan how we were going to execute this huge challenge. So, Sylvain came up with a plan. He took all the measurements of the boy room and he got in touch with a friend of his who owns an industrial material handling furniture company. At the time, we had no idea if his friend was going to be able to help us or not. But, in case he couldn’t, he should probably know someone who could.
It turns out that he had everything that we needed to start building Emile’s new bunk bed. You just can’t imagine the relief it was because we knew that he only works with the best materials. So, Sylvain and I went there and we bought all the necessary pipes, joints, fasteners, and a pipe cutter. We finally had all the material that we needed to start our very special DIY project.
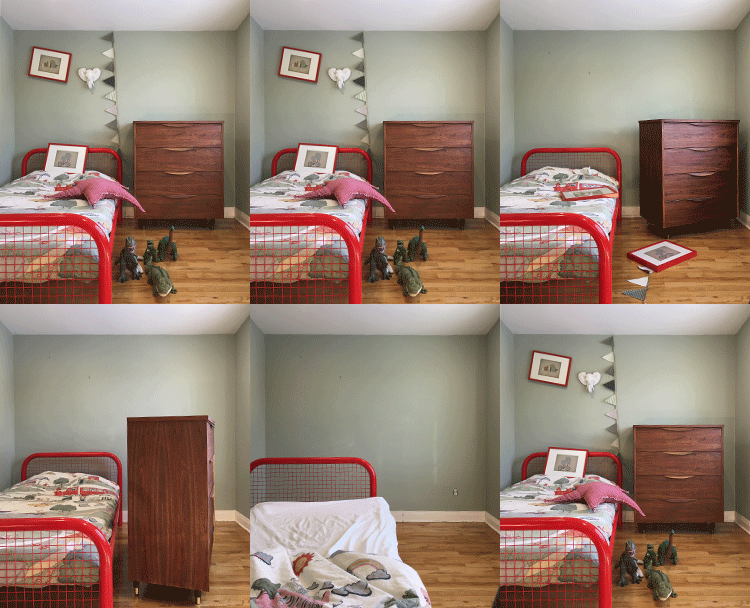
It was now time to take everything out of Emile’s room so that we could start building the bunk bed.

You just can’t imagine how Emile was thrilled with everything. He helped us every way through from taking all his things out of the bedroom and he even help us with the installation. You know this is not something easy for kids. As much as they like to help, they also like to see the immediate result. He really didn’t have that attitude, since we involved him in the project from the very beginning. He saw how we were struggling to find the perfect bunk bed for him. He just helped. And this showed us that we have been raising him the right way and to do the right thing. We were extremely proud of him.
The complete installation took us about 4-5 hours. While it may seem a lot, the truth is that between the small bedroom and figuring out the best way to put the bunk bed together, the time passed by instantly.
The Reactions
When you start a DIY project, you never know how it will end up.
Even though you try your best, sometimes things just don’t go as you planned. But, there are occasions when your DIY projects just keep amazing you from start to finish. And this DIY pipe bed is definitely one of them.
It has been a path filled with emotions. From the very first moment that we saw that Emile didn’t have enough room to play with his Legos or to have his blanket fort. To the time we spent looking for bunk beds both visiting physical stores and then online. Plus the moment that we saw exactly the bunk bed we were looking for. Until the moment that we installed everything and see the final result. But, no emotion is better than looking at Emile’s face and to see his reaction when his new bunk bed was finally installed. I can say that I got happiness tears falling from my cheeks. I’m not embarrassed to say that. It’s the truth. Seeing my little boy so happy with something that we built together as a family was the cherry on the top of the cake.
And he wasn’t the only one to be happy with the bed. His sister Leonie immediately started asking for one.

The First Night
What a day filled with emotions. From grabbing all the materials, emptying the entire bedroom, installing the new bed, and seeing the reactions of both kids made my day. But I hardly knew that it wasn’t over.
At night, when it was time for the kids to go to bed, Leonie decided that she wanted to sleep in his brother’s bedroom. Even though they get along very well, this has never happened before. So, I allowed it. On that night, I read a bedtime story for them in their new fort. I can tell you that it seemed magical. The moment was extremely special because I could see the happiness on their little faces. And there we were, as a family, enjoying a good moment that we will keep in our hearts forever. It was our moment, our world. Nothing else mattered.

AfterMath
As I told you at the beginning, Sylvain and I were a bit desperate to find the bunk bed for Emilie.
After all, the only bunk beds that we had seen and that we liked cost more than $1,000, which was a way out of our budget. So, at the time, we asked for the help of our friends on Facebook. So, when our DIY Bunk bed project was completed, we made sure to tell them how we did it and we showed them the results. You just can’t imagine the positive feedback we got from them and from other people as well. Our friends enjoyed our work so much that they showed it to other friends and the word got spread.
In my opinion, the main difference about Emile’s new bunk bed is that it looks pretty cool and it’s just a bed that you can’t find at IKEA. We know, we’ve been there.
Even though Emile has now a new bedroom that he loves and where he can play with his Legos and build his blanket forts, this DIY project is far from over. The truth is that we already had 5 people calling us to build a similar bunk bed for their kids. They are also struggling because of small bedrooms and they don’t have a high budget, just like we didn’t have.
So, with all this interest in our DIY bunk bed, we decided to create a kit and sell it on Etsy. One thing is for sure – it’s a lot more affordable than other bunked beds that you see around. But this project doesn’t stop here as well. We were also contacted by a local kid’s store and they say they are very interested in our bunk bed.
Conclusion
How could we know that from the single idea of redecorating our little boy’s small bedroom we would turn out to create a kit and sell it on Etsy and that we would be contacted by a local kid’s store?
It was impossible to have the slightest idea of what was going to happen. After all, we didn’t start on the right foot. We spent hours looking for a good bunk bed and they all exceeded our budget or they just wouldn’t suit our needs for one reason or the other. And now we are selling kits online to parents with the same problem. Life is just full of surprises…
In case you know how to create custom blankets with playful graphics or if you know someone who knows, please get in touch with me. After all, we just want the best for our kids and some custom blankets would look amazing on the bunk bed we created.
P.S. If you’re looking at loft bed similar to this one, but you’re short on time, you should check my list of loft bed for a kid’s room. I have searched the whole internet to find the coolest kid’s bed.
To get the best insights and tips to create an Instagram worthy kid’s room, I have read more than 200 blog post, look at (almost) every single kid’s room images on Pinterest and ask my friends or others parents. From all their insights and my own experience, I’ve also built this list of the perfect bunk bed with desk underneath for your kid’s room.

